Part 9: The Afterglow – Storing, Freezing & Reviving Bread
Congratulations, baker! You did it. Before you sits a masterpiece of crust and crumb, a beautiful, rustic loaf that you coaxed into existence. The aroma is intoxicating, and if you listen closely, you can hear the crust crackling and singing—a baker’s favorite song. This is the moment you’ve been working towards.
But wait! Before you grab a knife and slice into it, there is one final, crucial, and frankly agonizing step: You must let it cool completely.
The Science Bit: The Cool-Down is Part of the Bake
Why the torture? The bread is not finished cooking when you pull it from the oven.
Inside that scorching hot loaf, the starches are still gelatinized and the structure of the crumb is very delicate and saturated with steam. As the bread cools, two things happen:
- The Crumb Sets: The moisture redistributes throughout the loaf, and the gelatinized starches retrograde and set. This transforms the interior from a gummy, wet texture into the soft, spongy crumb of a perfect slice of bread.
- Flavor Development: The aromatic compounds continue to develop and settle as the bread cools.
If you cut into a hot loaf, steam will rush out, and you’ll be left with a gummy, wet-textured crumb. It will also stale much faster. Patience now will be rewarded tenfold. Think of it like resting a good steak after cooking; the magic is still happening on the inside. A minimum of 2 hours on a wire rack is essential, but 4-6 hours is even better for the best possible texture and flavor.
How to Store Your Masterpiece
Sourdough’s natural acidity makes it last longer than commercial bread. But how you store it depends on whether you want to preserve the crust or the crumb.
- For a Crispy Crust (Best for 1-2 days): Store the bread cut-side down on a wooden cutting board, with no covering. Pro Tip: Placing it cut-side down protects the exposed crumb from drying out while allowing the crust to breathe and stay crisp. Alternatively, a paper bag works well. This allows moisture to escape and keeps the crust from getting soft.
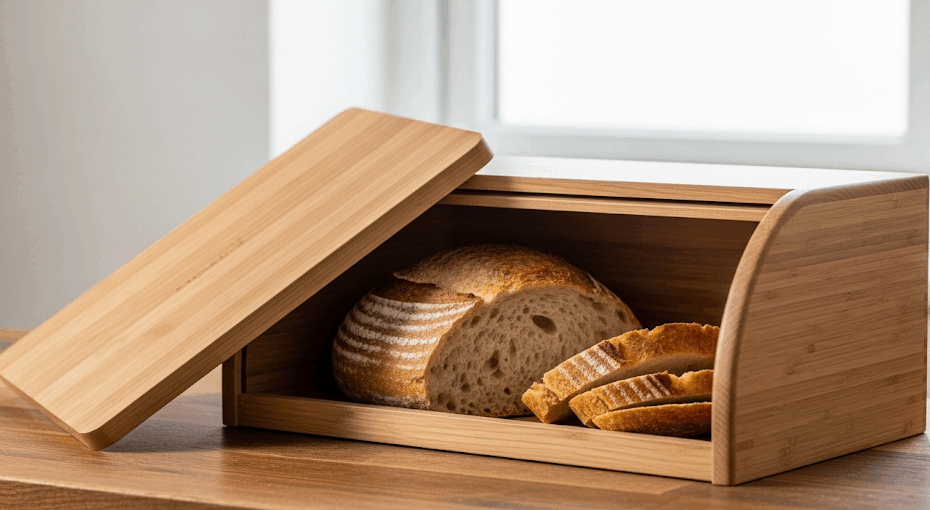
- For a Softer Crumb (Best for 3-5 days): Once the crust is no longer your top priority, store the bread in a reusable bread bag, a bread box, or a loosely sealed plastic bag. This will trap moisture, keeping the inside soft but sacrificing the crust’s crispiness. Never store bread in the refrigerator. The cold temperature accelerates the staling process (retrogradation).
Freezing: Your Bread Time-Capsule
Freezing is the absolute best way to preserve your bread for the long term.
- Wait: Make sure the loaf is completely cool.
- Slice (or Don’t): You can freeze the loaf whole, in halves, or as individual slices. Slicing beforehand is incredibly convenient for toast on demand.
- Wrap Tightly: This is the key to preventing freezer burn. Wrap the bread tightly in plastic wrap, and then place it inside a heavy-duty freezer bag, squeezing out as much air as possible.
- Freeze: It will keep beautifully for up to 3 months.
- Thaw: For whole loaves, let them thaw at room temperature. For individual slices, you can toast them directly from frozen—no need to thaw!
Reviving and Second Chances
That slightly stale, day-old bread isn’t done yet. It’s just waiting for a new purpose in life.
How to Revive a Whole or Half Loaf:
Run the loaf quickly under a tap of running water to lightly dampen the crust. Place it directly on the rack in a 350°F (175°C) oven for 10-15 minutes. The water re-steams the inside, and the heat re-crisps the crust. It will taste almost as good as it did on day one.
Creative Uses for Stale Bread:
When bread gets stale, it hasn’t gone bad; it has just lost its moisture. This makes it perfect for things that require dry, sturdy bread.
- Croutons: Cube it, toss with olive oil and herbs, and toast until golden.
- Breadcrumbs (Panko): Blitz it in a food processor for homemade breadcrumbs.
- French Toast or Strata: Stale bread is much better at soaking up the egg custard without falling apart.
- Panzanella: A classic Italian bread salad that is built around stale bread.
- Ribollita: A hearty Tuscan soup thickened with… you guessed it, stale bread.
You are now equipped with the fundamental knowledge to create incredible bread and enjoy it to the very last crumb. This is just the beginning of your journey into the rich world of European baking. Welcome to the obsession. We’re so glad you’re here. Happy baking!
Jump directly to your favorite part:
- Pretzel & Rye Beginner’s Guide – Part 1: Taming the Yeast Beast (Your Sourdough Starter)
- Pretzel & Rye Beginner’s Guide – Part 2: The Autolyse – Giving Your Flour a Spa Day
- Pretzel & Rye Beginner’s Guide – Part 3: Mixing & Kneading – The Great Gluten Workout
- Pretzel & Rye Beginner’s Guide – Part 4: Bulk Fermentation – The First Big Rise
- Pretzel & Rye Beginner’s Guide – Part 5: Divide & Conquer – Preshaping Your Dough
- Pretzel & Rye Beginner’s Guide – Part 6: The Final Shape – From Blob to Boule
- Pretzel & Rye Beginner’s Guide – Part 7: The Final Proof – The Beauty Sleep
- Pretzel & Rye Beginner’s Guide – Part 8: The Grand Finale – Baking Your Loaf
- Pretzel & Rye Beginner’s Guide – Part 9: The Afterglow – Storing, Freezing & Reviving Bread